Current Infrastucture News Current Infrastucture News
Archive of Infrastucture News: 2013-14 - 2015-16 - 2017 - 2018 - 2019 - 2020 - 2021-22 - 2023
Archive Reports: Northern Extension Project -
Permanent Way and Lineside News (2007-2011) - P-Way News (2002-4)


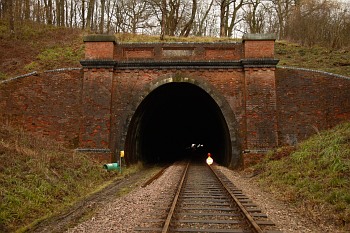
Track relaying in West Hoathly Tunnel 2010
Text and photographs: Michael Hopps
By clicking on the images you will be taken to a larger version of each
photo showing more detail.
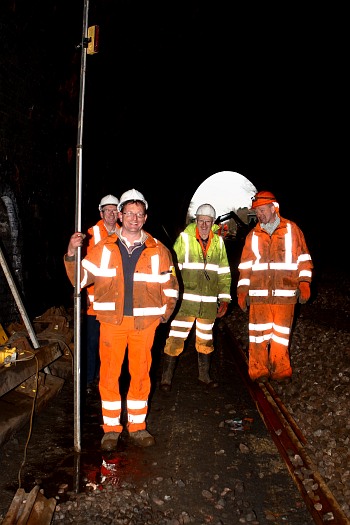
For those of you not lucky enough to be involved with relaying the track through
the tunnel, we can finally reveal details of all the subterranean 'goings on'
back in late February and March. Many will have wondered how such a major
undertaking could be completed in such a short timescale by a heritage railway;
and for those working on the project, it was indeed an eye-opener to what could
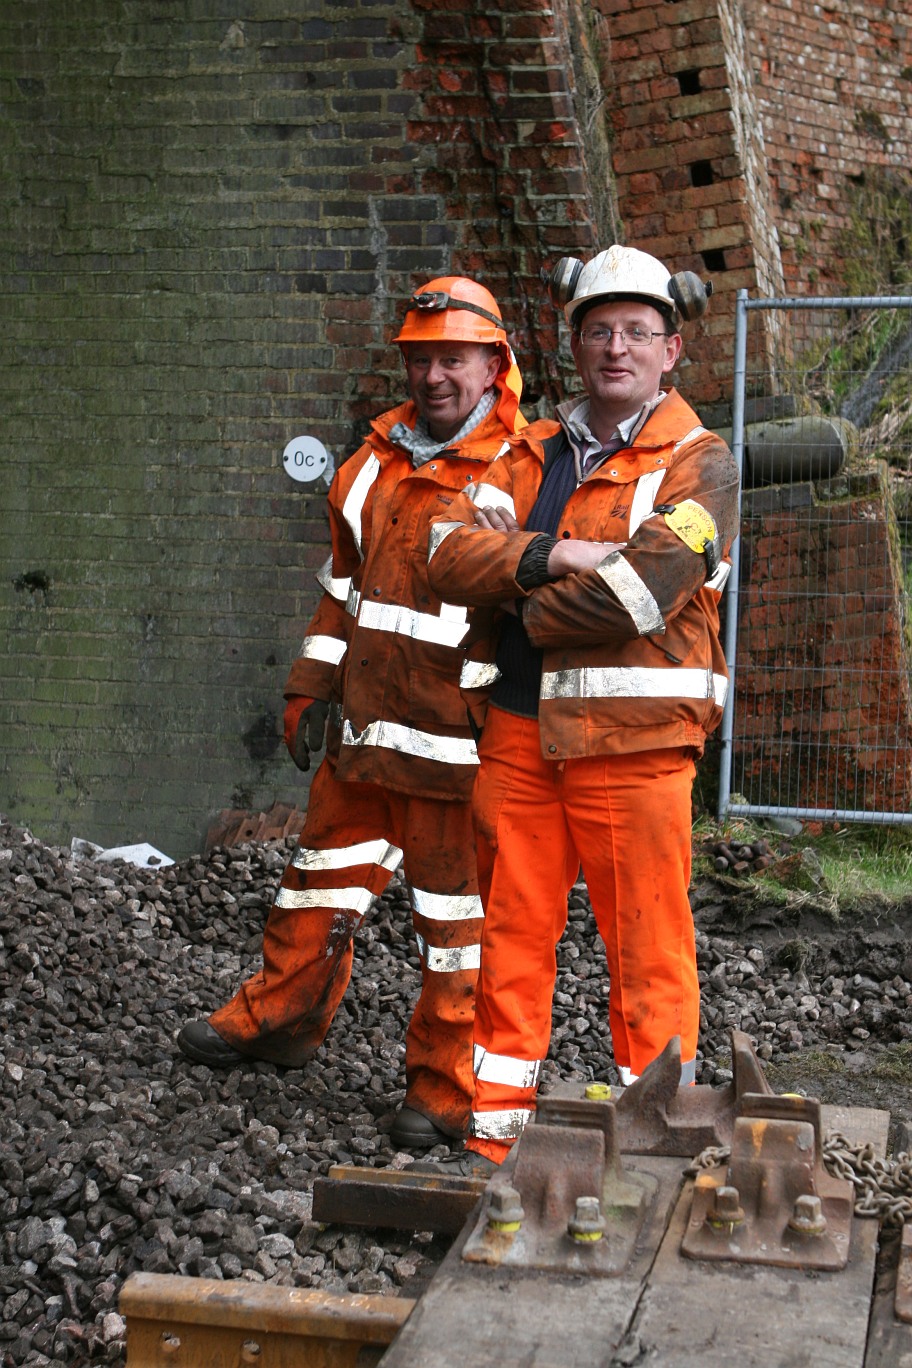
be achieved with minimum equipment and mostly volunteer labour. The credit for
the organisation of the task must go to Infrastructure Director Chris White
along with Matt Crawford, the Permanent Way Manager, who directly supervised
operations and made sure everything ran smoothly and on time.
| |
|
|
 |
 |
 |
| |
|
|
|
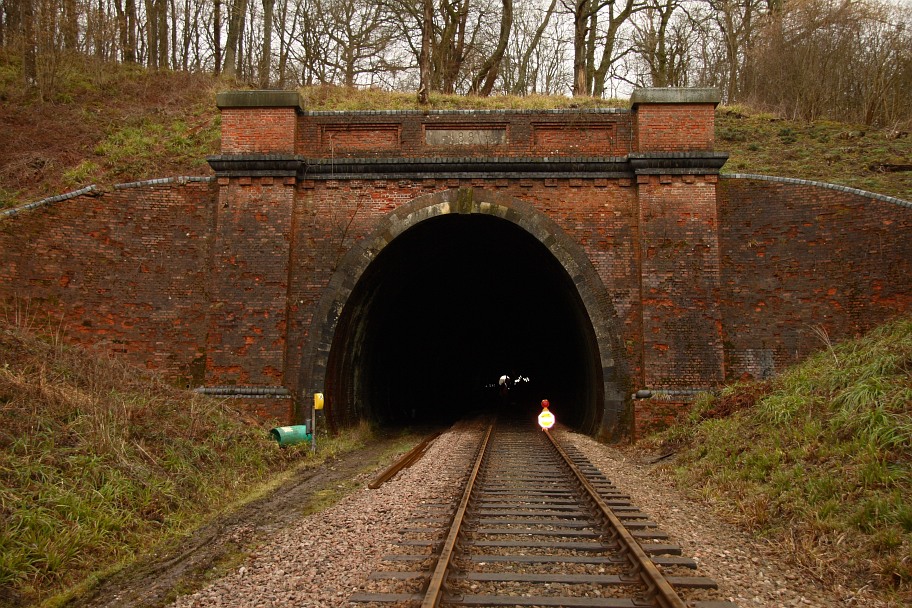
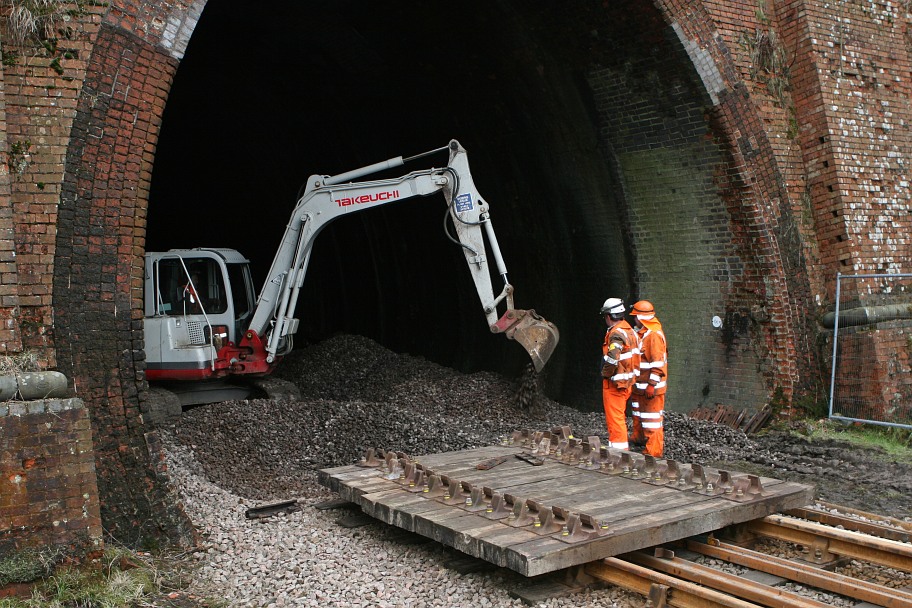
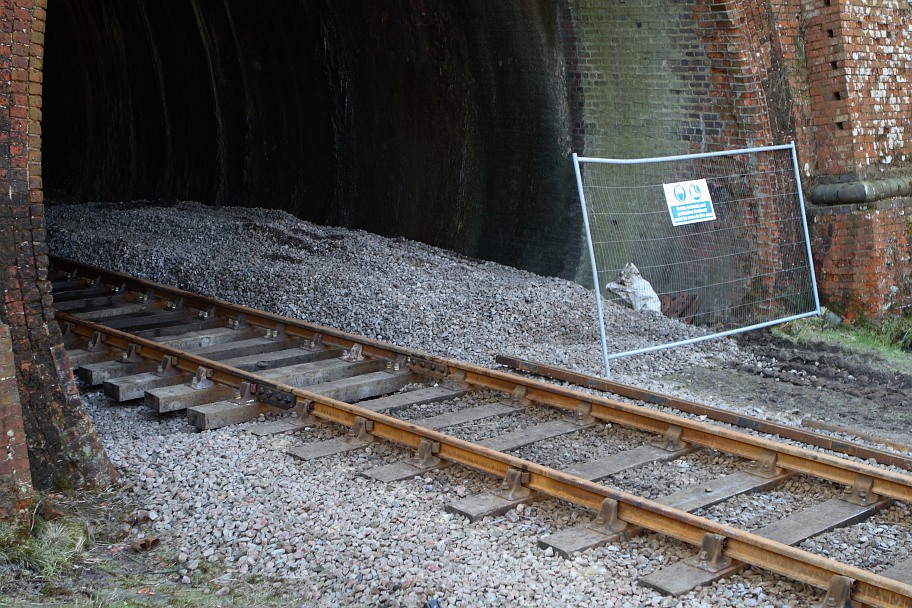
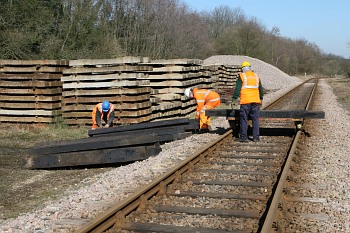
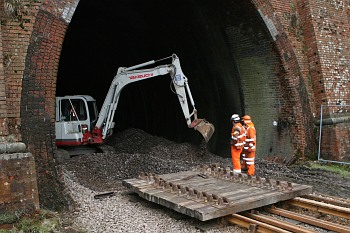
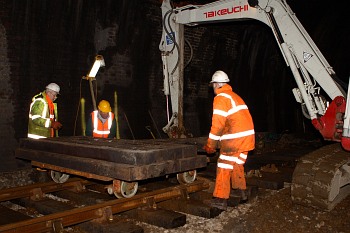
View of the
south portal and the STOP sign. |
129 years and
counting. |
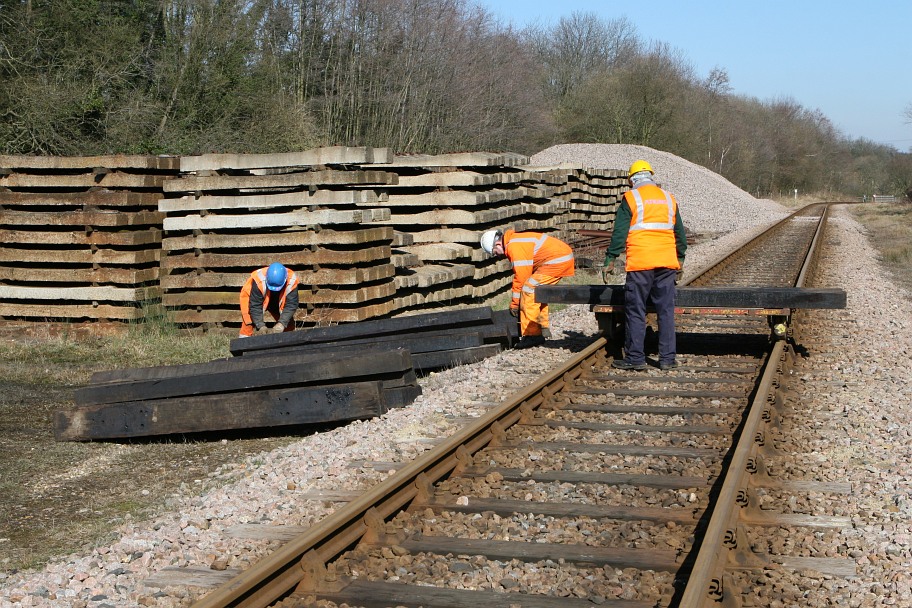
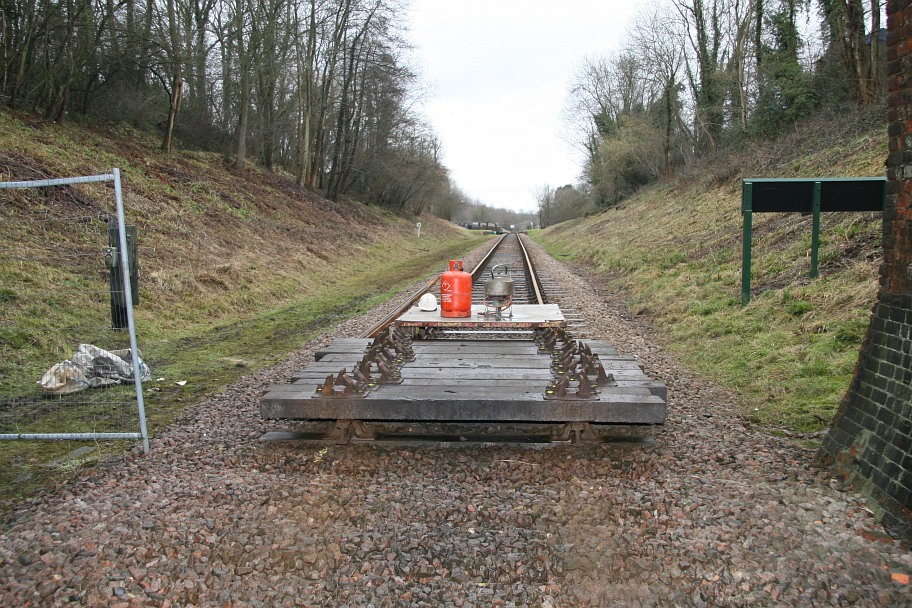
New and
reclaimed sleepers being loaded on to the trolley at West Hoathly. |
| |
|
|
 |
 |
 |
| |
|
|
|
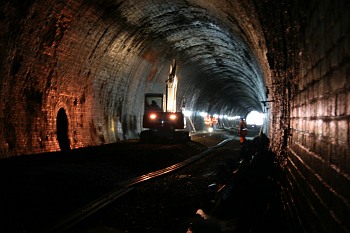
The view from about 2/3rds
the way along from the north end and looking south. The new bullhead rail
has been delivered to site and is lying in position on the access road. |
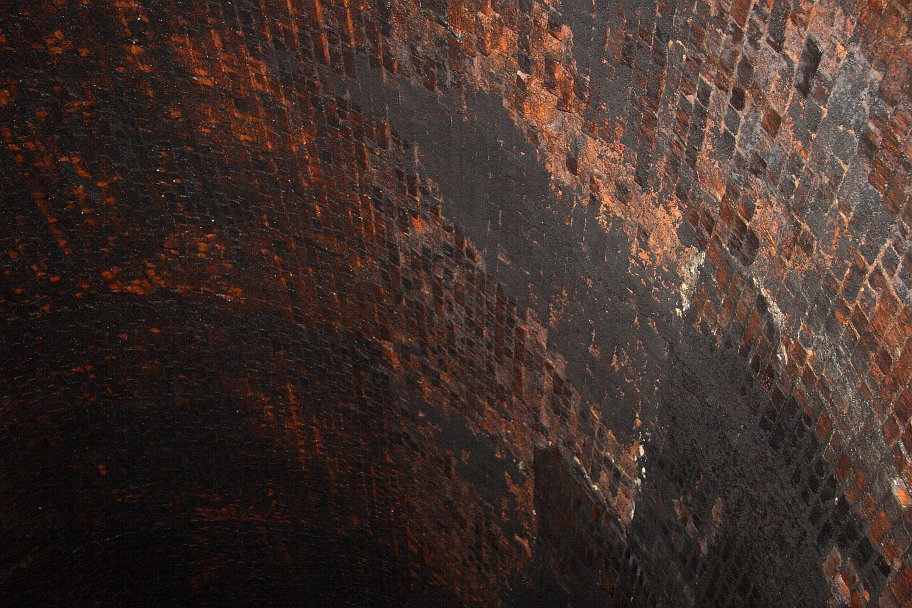
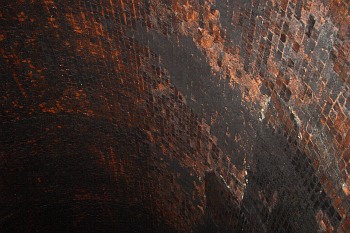
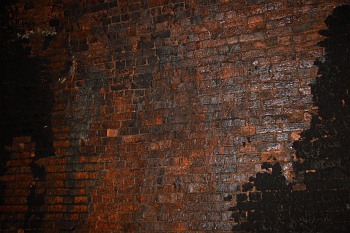
Much of the
internal brickwork looks like this – looking towards the crown of the
tunnel near the north end. |
What was
that story again about 'ghosts' in the tunnel? Automatic cameras are
really fooled by the reflections! |
| |
|
|
Organising the
relaying of the track through the tunnel was a major logistical exercise which
started long before the work actually commenced. New 95lb/yard bullhead rail was
ordered and delivered to Horsted Keynes well in advance, and one end of each
length was pre-drilled ready for eventual alignment before sections were welded.
Contractors for the specialist work had to be booked and a very tight time frame
agreed so that, while allowing a small margin for inevitable delays on a project
of this size, work would be completed in time for the new season.
| |
|
|
 |
 |
 |
| |
|
|
|
A section of
side wall showing evidence of steam trains! Most of the brickwork is
in remarkably good condition. |
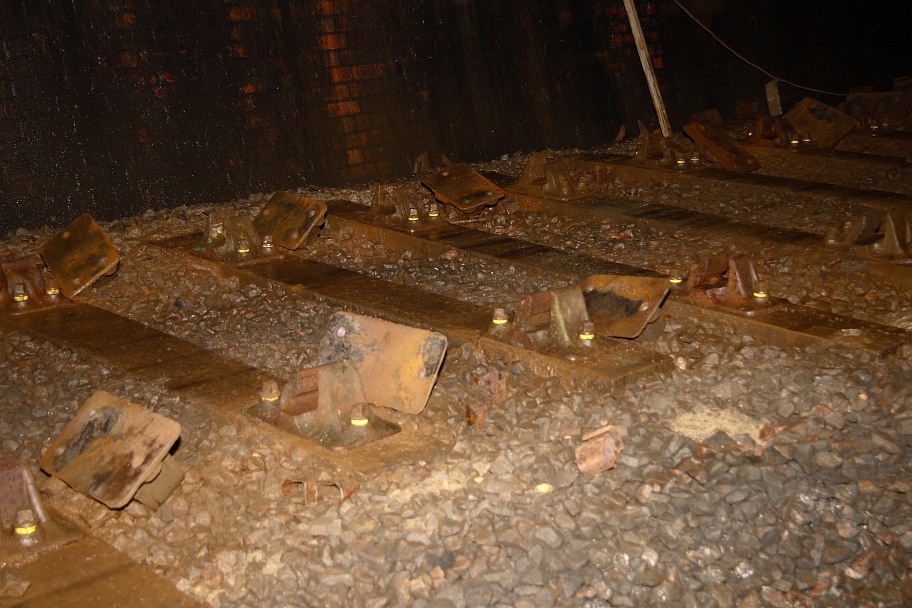
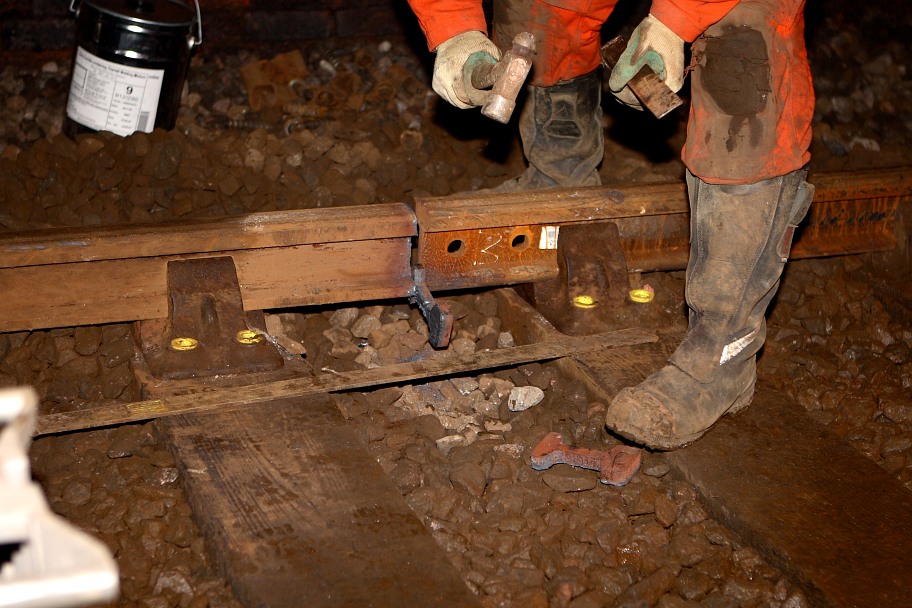
Fitting new
chairs and replacing the ferrules. |
Sleepers in
their original position but with new chairs fitted. |
| |
|
|
 |
 |
 |
| |
|
|
|
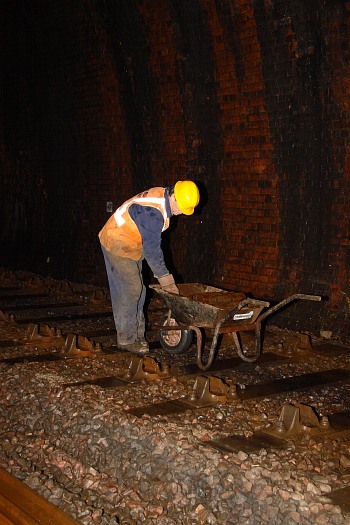
Putting the
old chairs into piles ready to be collected later. |
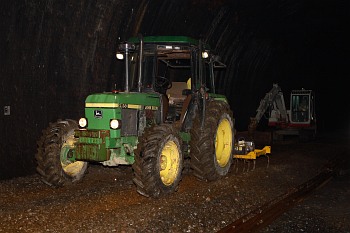
Moving the
sleepers by hand would be difficult – using the digger is essential. |
Stacking
sleepers to the side of the tunnel after new chairs have been fitted. |
| |
|
|
Preparatory work on the project started before the tunnel closure and the new
rail was delivered to site and positioned on the up side throughout the length
of the tunnel near the running rails. A number of new sleepers were also
delivered to the north end of the tunnel, because for the new alignment the
sleeper count was increased to allow for 28 per panel rather than the original
24. New and replacement sleepers were also required to replace those no longer
deemed to be serviceable. A work compound was set up on the site of the
old West Hoathly station for messing facilities, and as a base for
deliveries and contractors.
| |
|
|
 |
 |
 |
| |
|
|
|
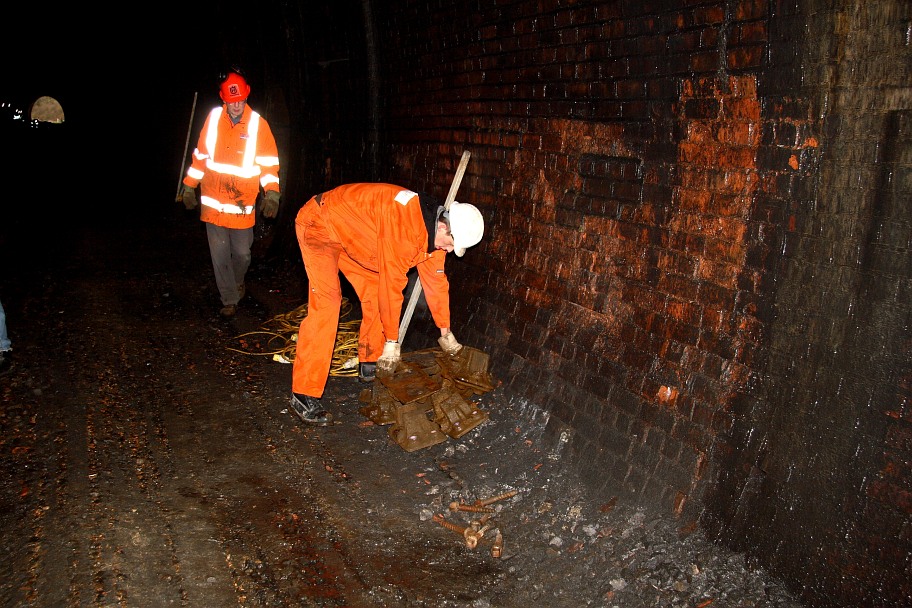
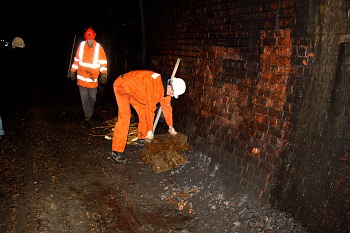
Collecting up
keys and fishplates as the work progresses. |
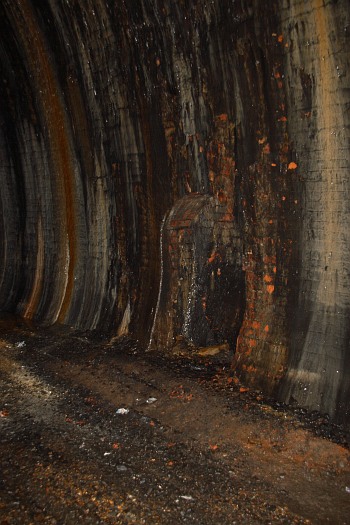
There are
sections where water and salts have left their mark. In places it is a bit
damp, no doubt as a result of all the recent rain. Despite looking slimy,
it is in fact hard as rock, and the colours are amazing. |
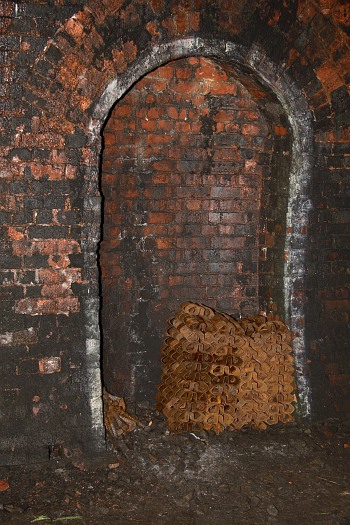
A refuge makes
a very good place for temporary storage. It's dark down there, so keeping
things safely together is important. |
| |
|
|
 |
 |
 |
| |
|
|
|
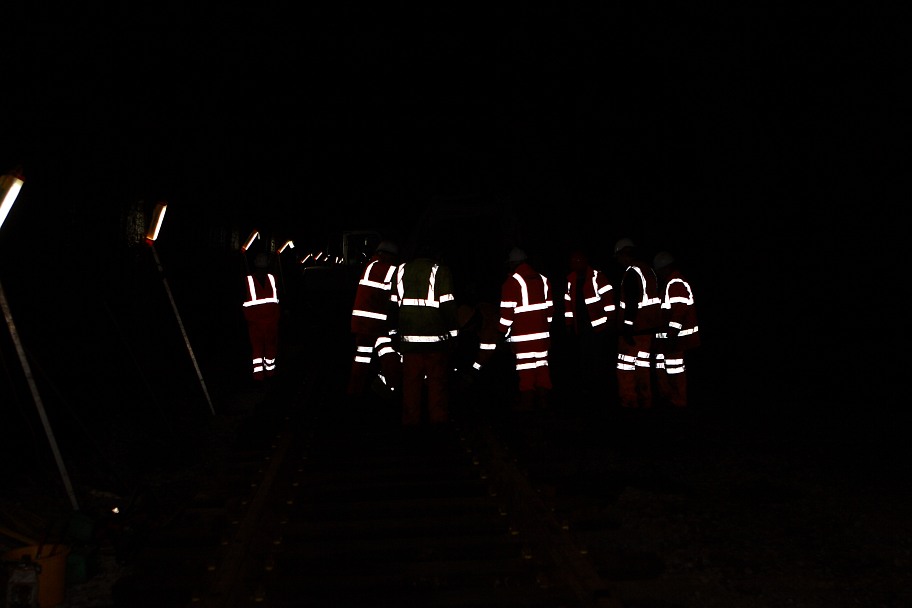
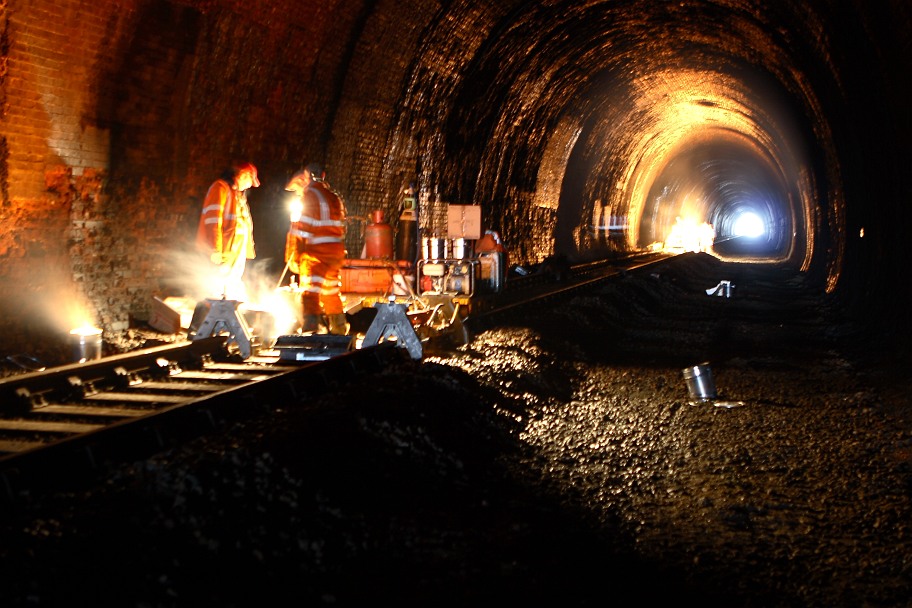
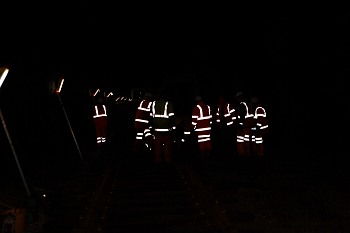
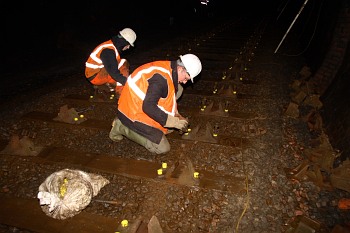
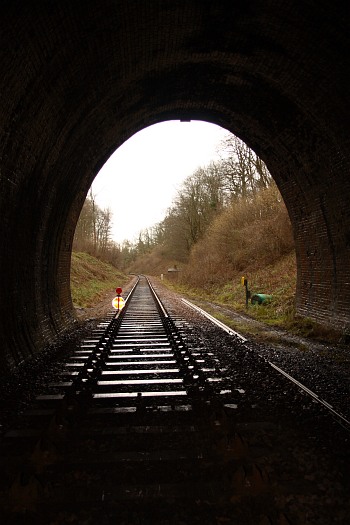
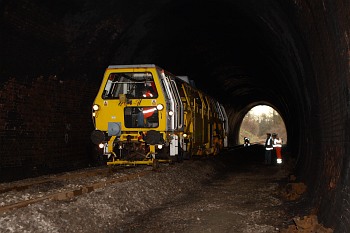
"We have
possession" – and this is as far as you can go! The view from just inside
the south portal, waiting for the sleepers to be lifted. |
Teamwork is a
great leveller! |
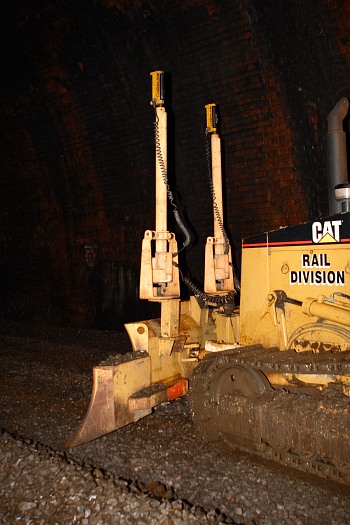
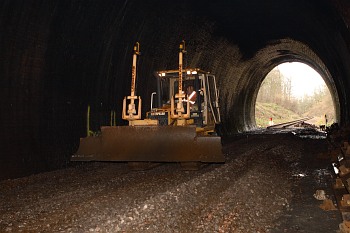
Laser sights
on the dozer blade follow the beam. |
| |
|
|
Once the 'tunnel gang' had full possession work started in earnest, and the
track was disconnected at either end. From the north end keys and
fishplates were removed panel by panel and pairs of old rails were jacked up and
released from their chairs before being rolled to the centre of the
sleepers. The rails were then dragged by digger to a temporary stack at
the south end of the tunnel, ready for removal to the Salt Yard at Horsted Keynes.
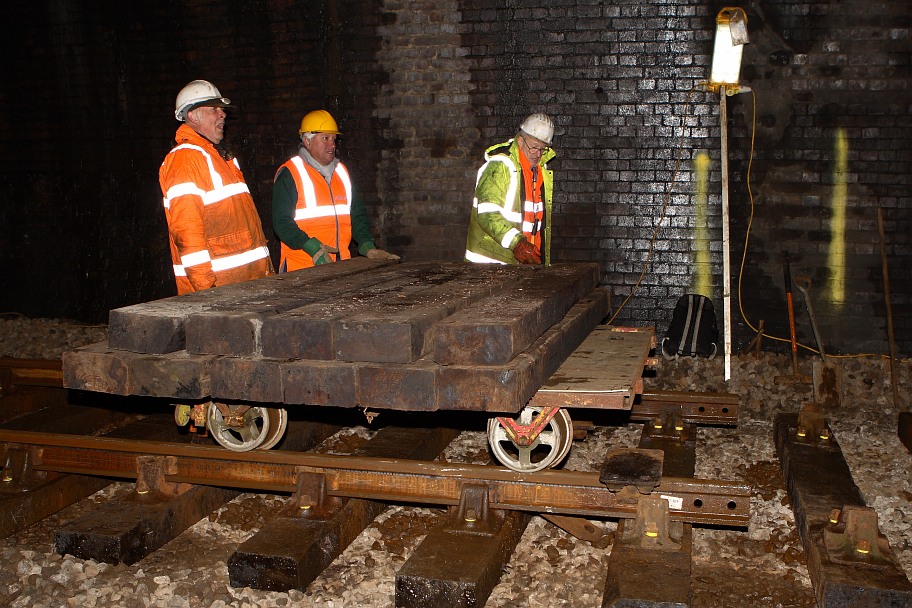
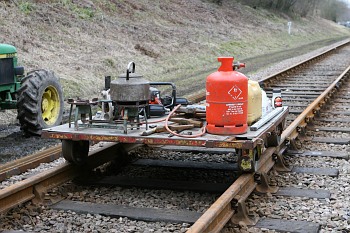
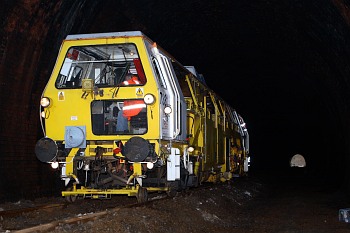
Meanwhile the 'Wickham' delivered pallets of new chairs and ferrules which were
distributed throughout the length of the tunnel, ready to replace the old ones.
| |
|
|
 |
 |
 |
| |
|
|
|
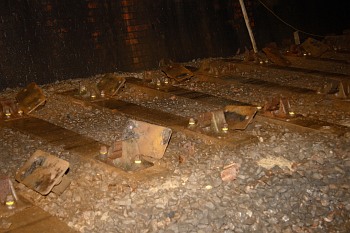
Sleepers
stacked neatly in piles, ready to be re-used. A bit difficult if you need
to use the phone! |
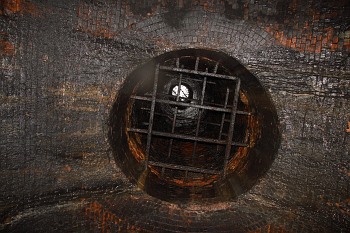
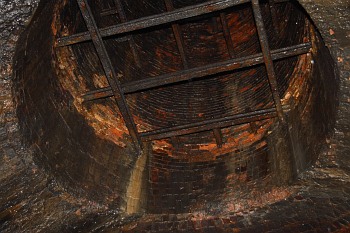
If you ever
wondered what it was like to look up a ventilation shaft... It's about the only
place in the tunnel to get a signal on your mobile! |
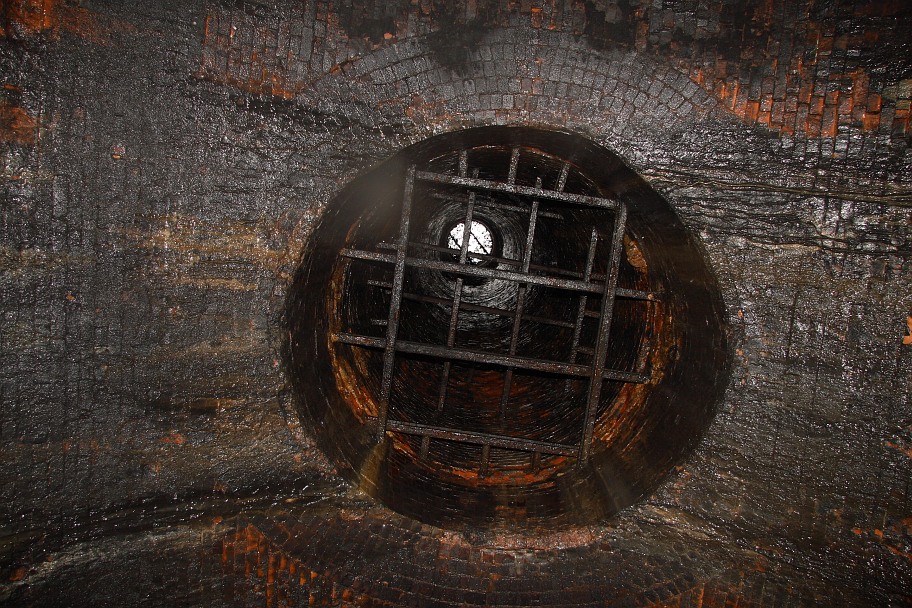
A closer view of
the throat of a ventilation shaft, showing the grille made out of what appears
to be sections of bullhead rail. |
| |
|
|
 |
 |
 |
| |
|
|
|
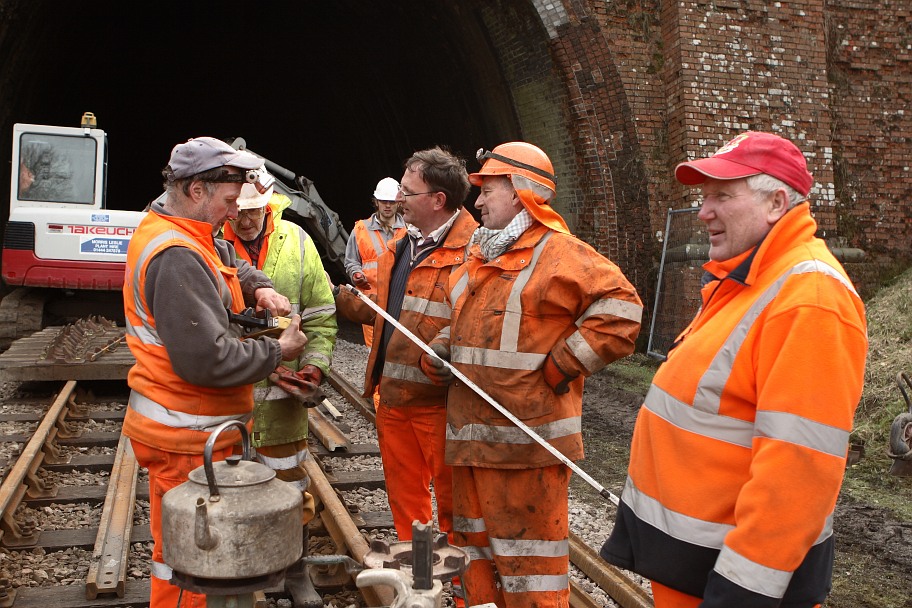
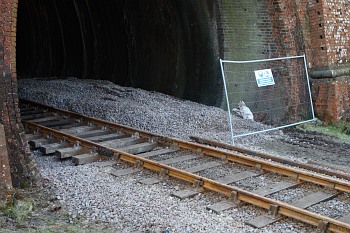
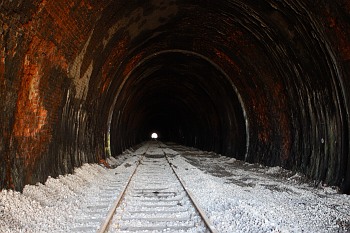
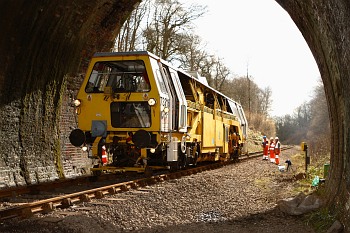
The view from just
inside the north end of the tunnel mouth – no danger of trains here now, but
showing a very important piece of trackside equipment. The kettle! |
View of the track bed at the north end with rails and sleepers lifted, ready for the dozer and re-alignment. |
A low-tech
raking solution – which worked very well to break up the ballast. |
| |
|
|
Work now proceeded south in an organised pattern with each daily gang split into
three groups: the first group removing the rails, the second group following
closely behind replacing the old chairs, and finally the third gang working with
the digger to lift the sleepers, with new chairs fitted, into stacks of five or
six by the up side tunnel wall ready for relaying. All the old rail had been
stripped out by Thursday 25th February and by Saturday 27th all the sleepers had
been re-chaired and stacked.
| |
|
|
 |
 |
 |
| |
|
|
|
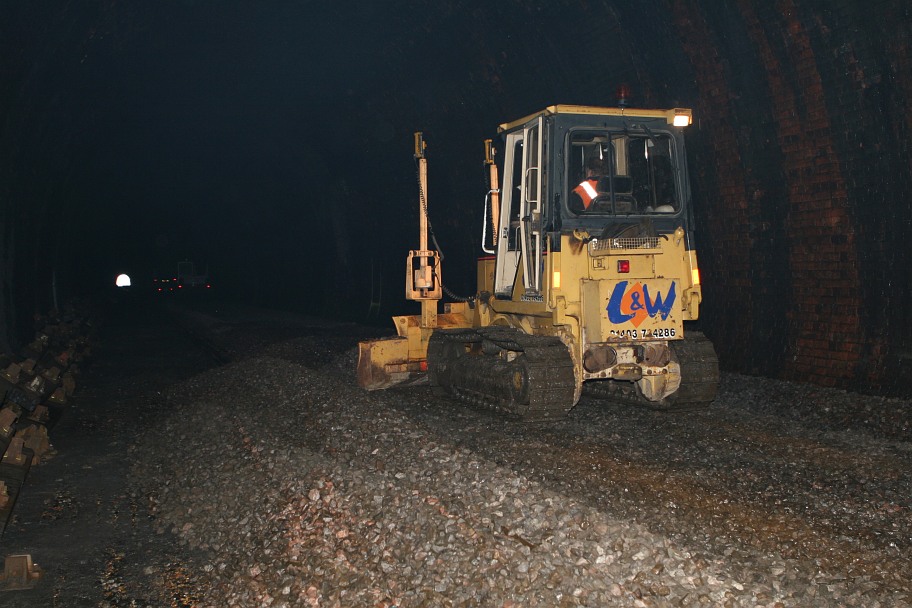
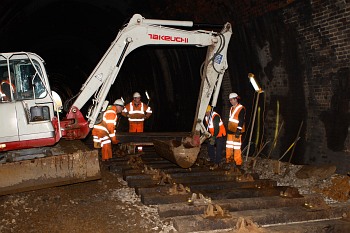
Just starting
with the dozer on the first section from the south end. |
It's a long way to
that little hole at the other end. |
Did we say we
needed more ballast? |
| |
|
|
 |
 |
 |
| |
|
|
|
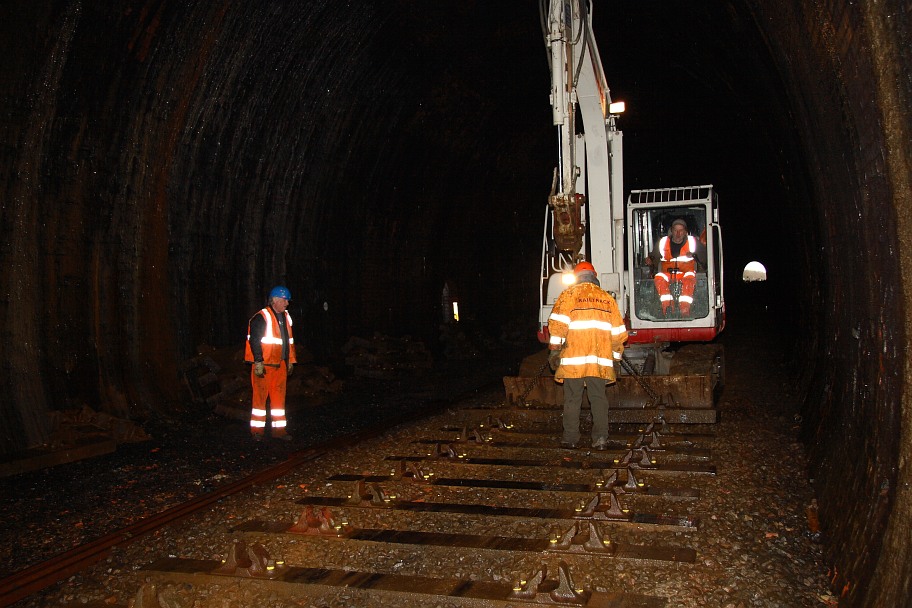
The dozer
couldn't quite finish at the north end so a bit of tidying up was needed
before tracklaying could start. |
The first new
panel in place at the north end. |
Tracklaying
going well on the first day. About three panels in – only 33 to go now! |
| |
|
|
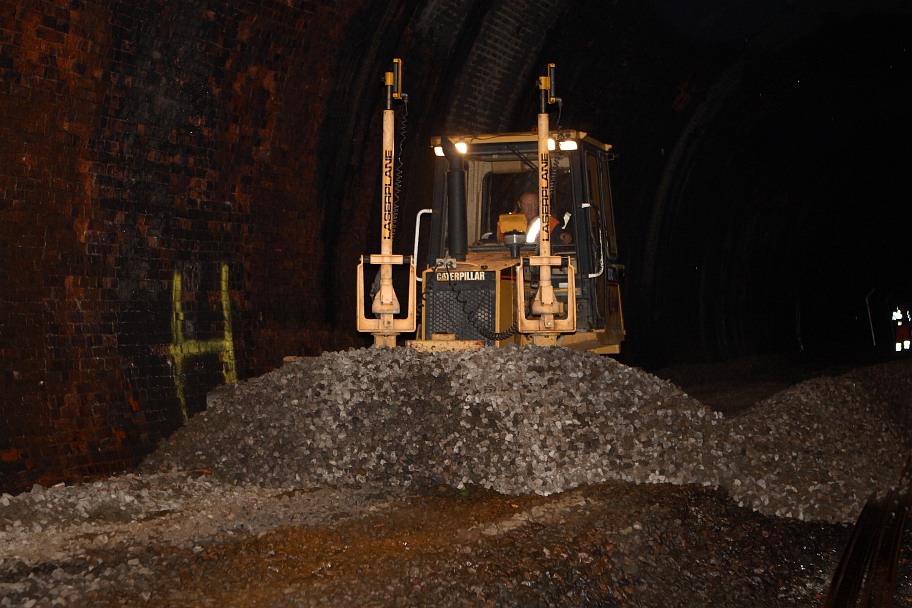
The following week work started on levelling and realignment – what would
have been a very difficult and time-consuming job without the use of a laser-guided bulldozer which was hired in. The first job, however, was to break up
the old ballast and the low-tech solution was a simple field rake on the back of
a standard tractor! Readers will wonder why this was necessary, seemingly
adding to the work involved; but it was important to break up the 'memory' in
the ballast because, over many years' running, small pieces of ballast can compact
into a hard pad under existing sleepers. This would badly affect re-alignment
and, ultimately, drainage.
| |
|
 |
 |
| |
|
|
Yes, I think
we got the sums right –
better check though. |
Happy after
'dozing' all day! |
| |
|
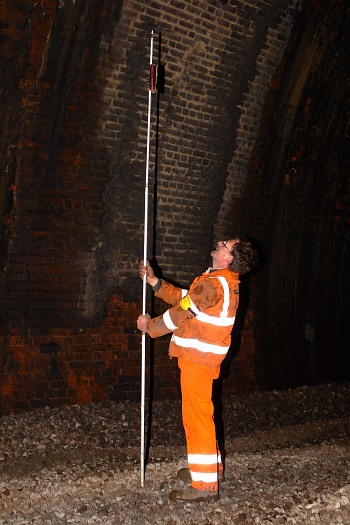
The tunnel was surveyed for correct levels before the job started, taking into
account the 1 in 75 rise from the south. Markers were set up in a number
of positions beforehand so that the levelling could take place in several
stages, because the rotary laser level being used is only effective over a
certain distance. Starting from the south end, the digger was positioned
about 100yds in front of the dozer at a pre-determined spot and the laser level was
set up on the roof of the cab. Then a levelling staff was walked down to
the dozer to double-check accuracy. The dozer then moved towards the
digger and the laser sensors on the blade followed the beam to maintain the
correct alignment. If necessary corrections could be made as the work
proceeded; however this was not found to be necessary, and the dozer job
was so good you could have laid a straightedge along the top of the ballast.
The excess ballast was pushed to one side to be re-used after the track
was laid, and more ballast was brought in to finish the job before the tamper
arrived.
| |
|
|
 |
 |
 |
| |
|
|
|
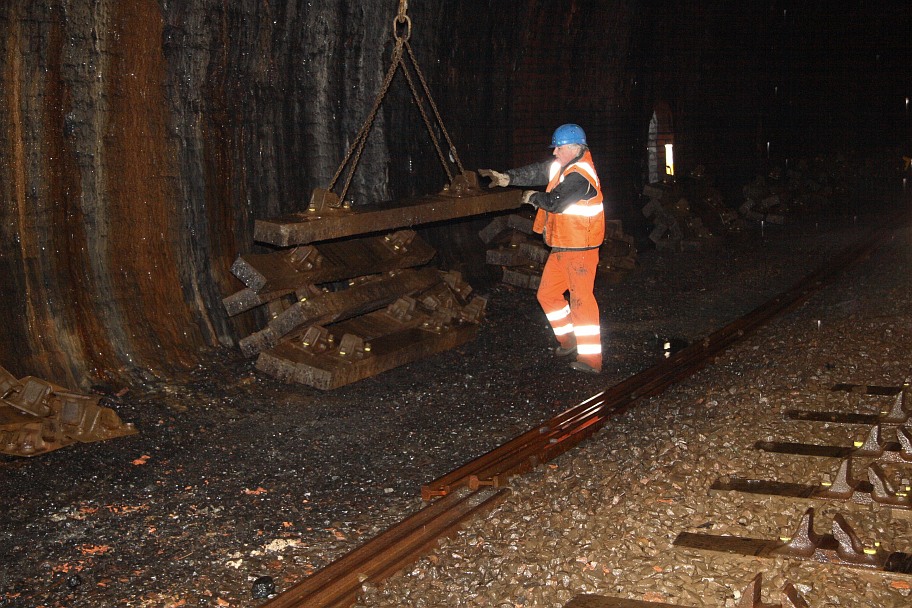
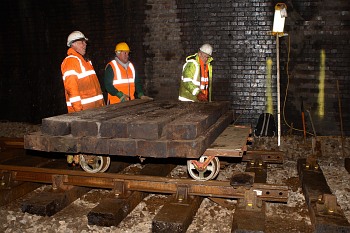
More sleepers
are brought in from the yard. |
The digger
making light work of moving them at this end. |
Filling in the
gaps because of the new sleeper spacing. |
| |
|
|
 |
 |
 |
| |
|
|
|
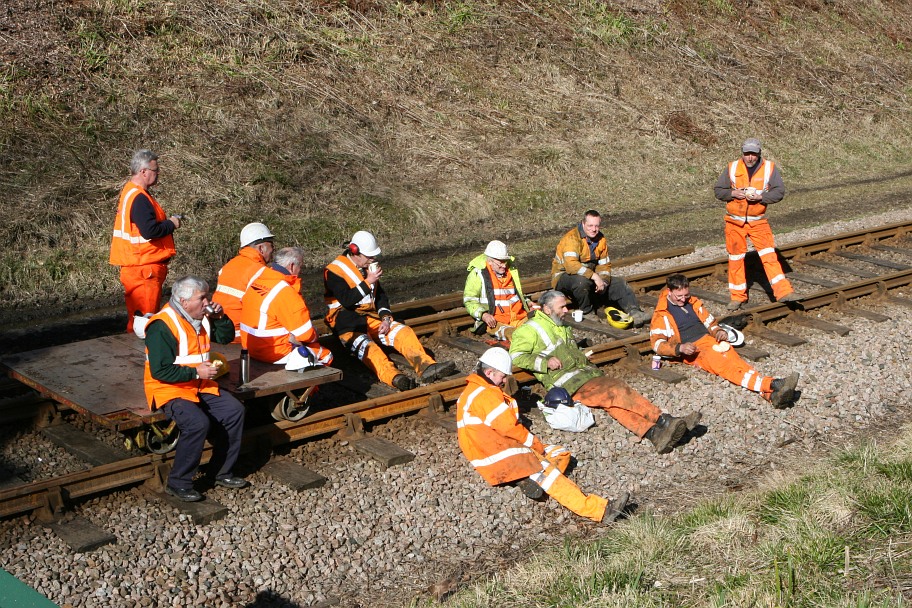
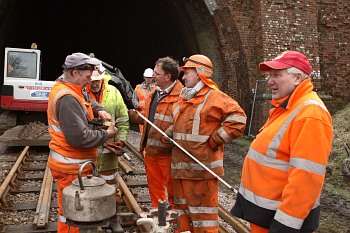
A well-earned
rest at lunchtime on a day when it wasn't raining outside. It
rained inside the tunnel most of the time! |
View from the
north end looking south, with added ballast. Ready for the tamper
visit. |
A job well done. Refreshments
for the troops from the 'tea trolley' after a long walk to the north end! |
| |
|
|
With the levelling complete, work now started on relaying the sleepers from the
north end, at the new spacing and with the new rail. Fishplates were attached to
each length provisionally for alignment, but this was only to hold everything in
place until the welding was done. Tracklaying proceeded south with due
attention being paid to side clearances, and new connections were made at both
the north and south ends to include track circuit insulators. Tracklaying and
ballasting was completed by the weekend of 13/14th March, and on
the following Monday the tamper travelled through the tunnel to complete the
final task before the welding gangs arrived.
| |
|
|
 |
 |
 |
| |
|
|
|
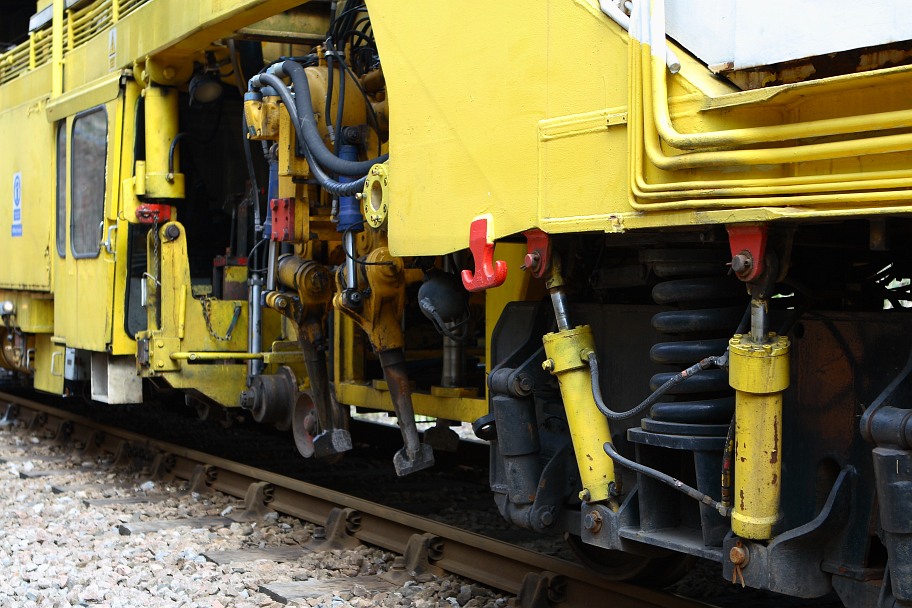
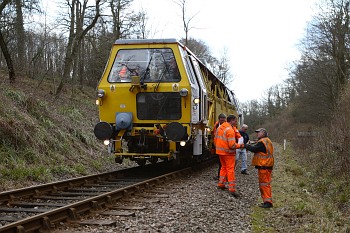
The tamper arrives
on site from Horsted. |
Ready for the
off, after final checks. |
Starting work
from the south end. |
| |
|
|
 |
 |
 |
| |
|
|
|
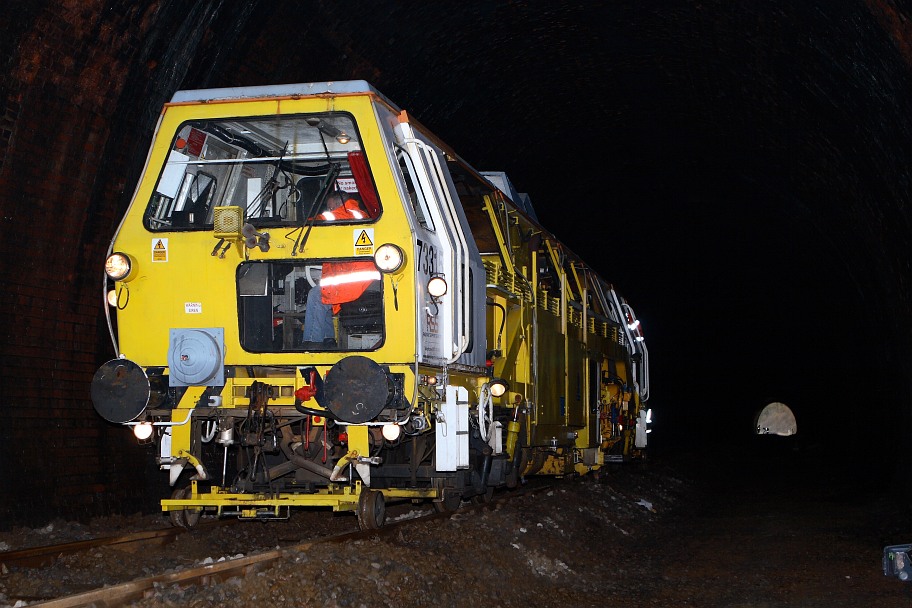
About a
quarter of the way in. |
These guys are
used to working at night, so no problem working inside the tunnel! |
About three
quarters of the way through. |
| |
|
|
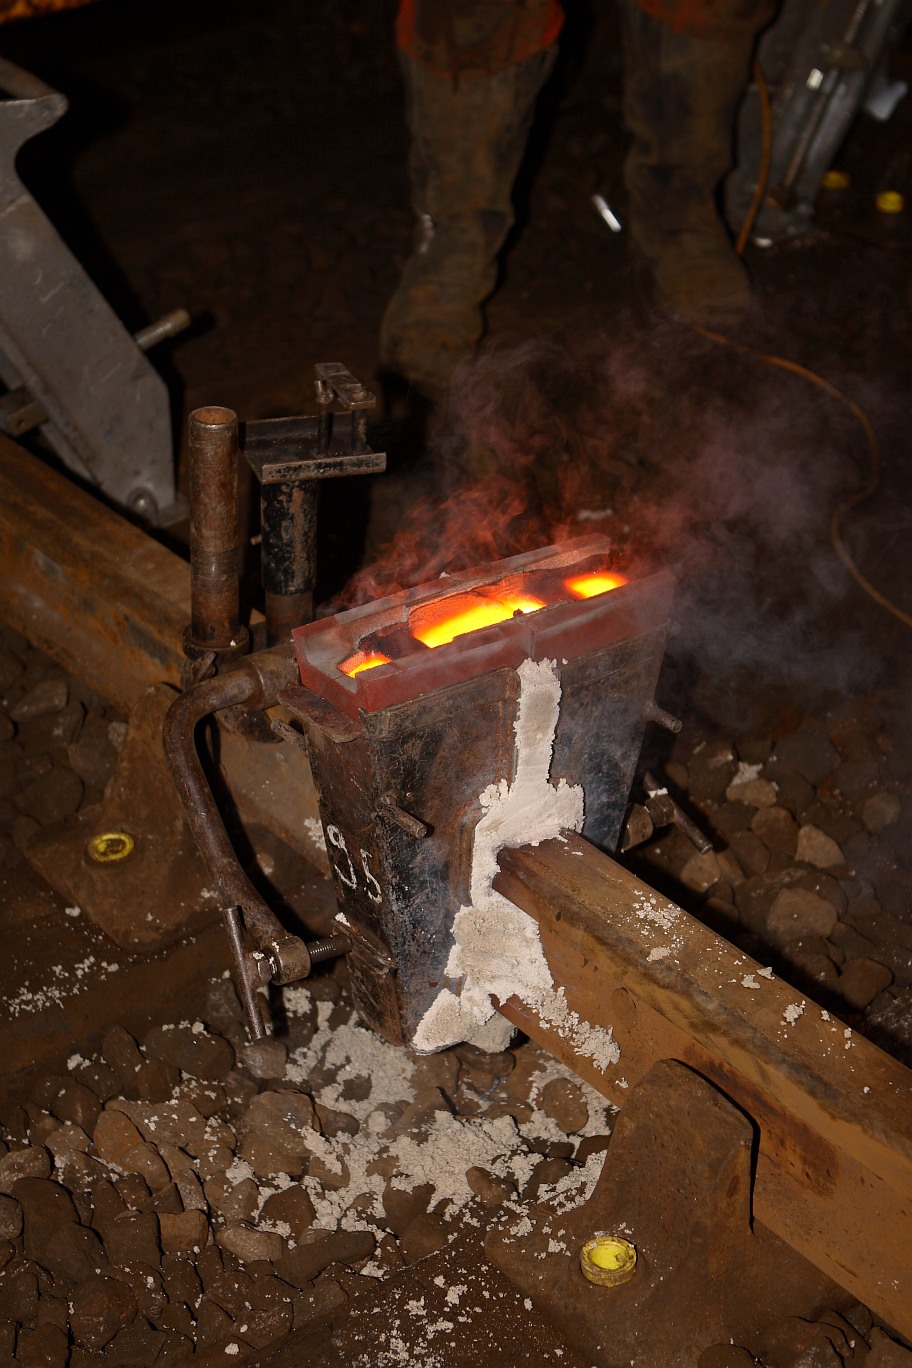
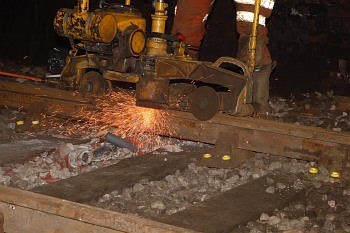
Welding each of the 66 joints took place on the remaining days that week, with
two gangs working from the north end of the tunnel about four joints apart. The
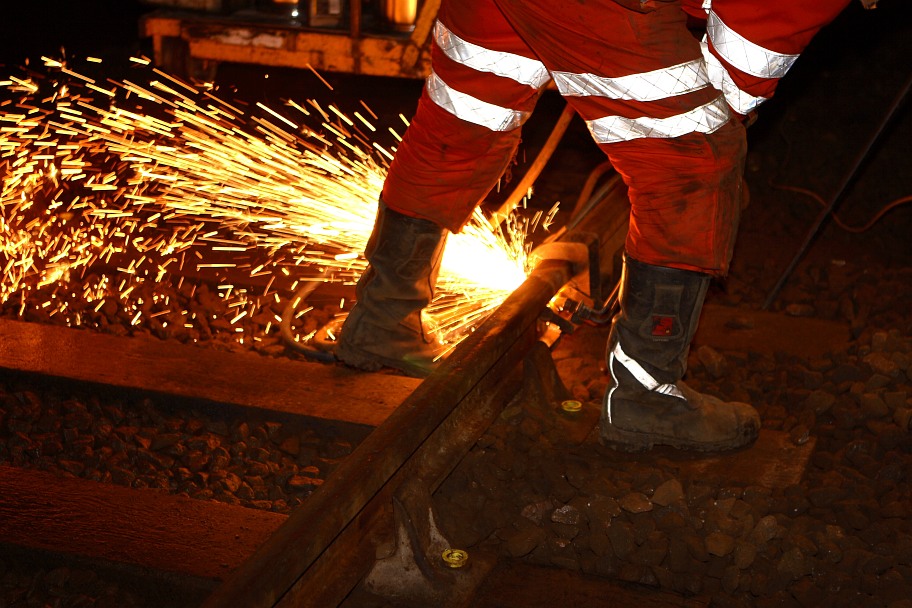
thermit welding process required very precise alignment of the rails. With
the fishplates removed and a chair from either side of the joint moved out of
the way, the positioning jigs could be set up. A gap (about 25mm)
was made between the rail ends with a cutting torch, and then moulds were fixed
either side of the joint to contain the weld metal.
| |
|
|
 |
 |
 |
| |
|
|
|
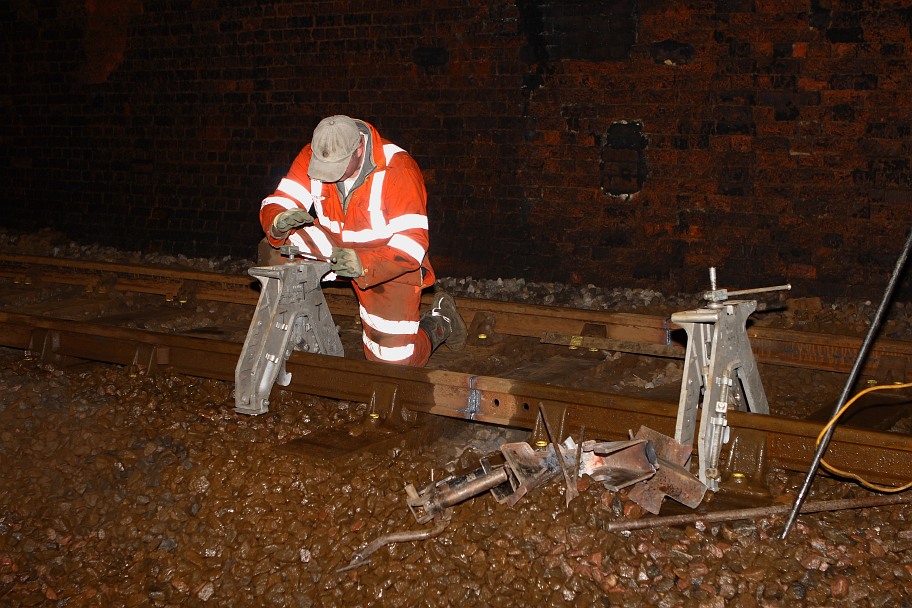
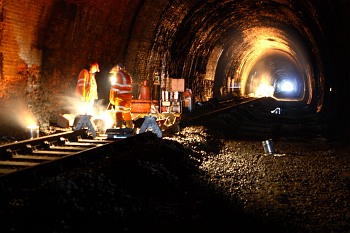
The first job
for the welding team was to cut out a small section of rail. |
Knocking out
the cut-away piece to leave space for the weld metal. |
Placing the
alignment jigs either side of the join. |
| |
|
|
 |
 |
 |
| |
|
|
|
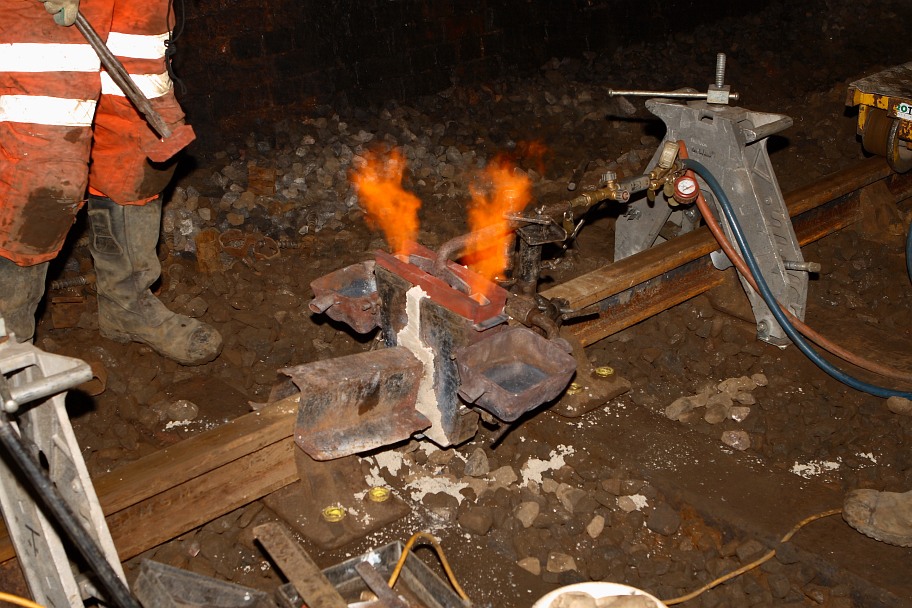
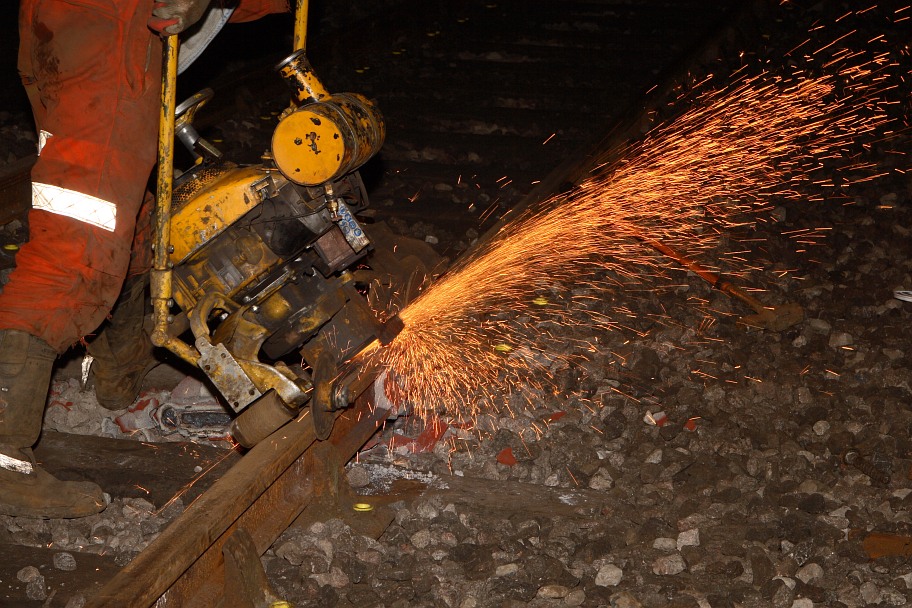
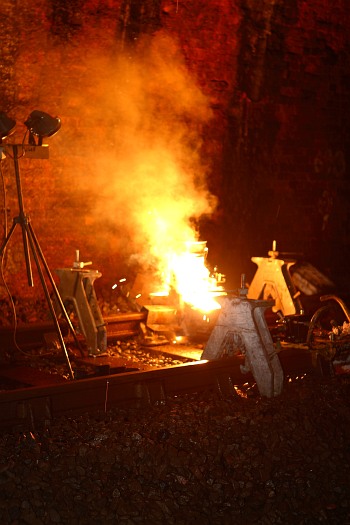
Pre-heating
the rail ends with the mould in place. |
The thermit welding process is pretty
spectacular. |
No flashgun
needed for this shot! |
| |
|
|
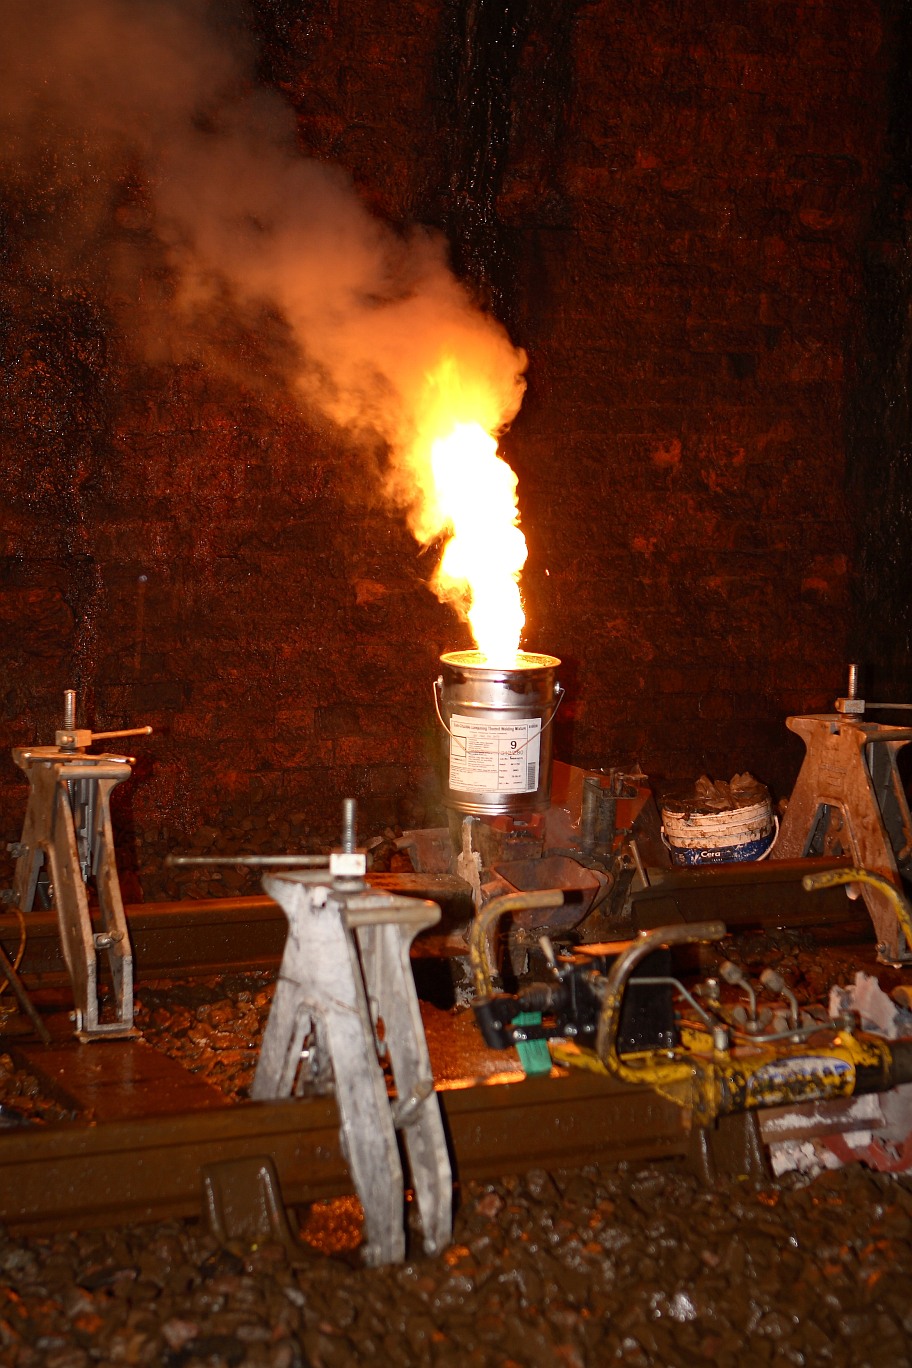
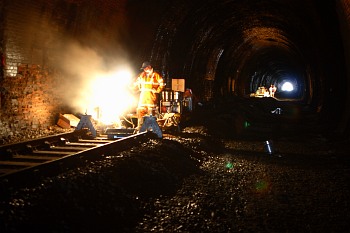
Preheating of the rail ends is done with another oxy-propane torch in preparation
for the thermit welding
process, which relies on an aluminothermic reaction to make the weld.
I won't bore you with the details, but suffice to say that when the crucible
can containing the chemicals is ignited with something resembling a sparkler, the
result is akin to a good show on bonfire night. Within the confines of the
tunnel, and in more or less complete darkness, the effect is really
spectacular. The moulds are broken away shortly afterwards and then the excess
weld is trimmed of waste metal while still hot, leaving only a little excess for
later grinding.
|
|
|
|
 |
 |
 |
| |
|
|
|
Crucible tin
in place and chemicals ignited. |
Just like
bonfire night as the weld takes place. |
Finished weld
cooling in the mould. |
| |
|
|
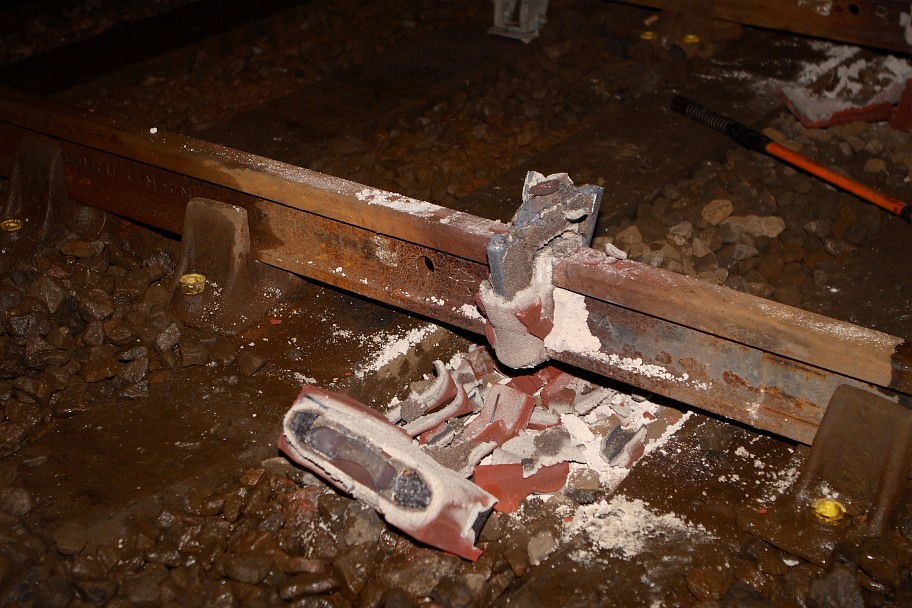
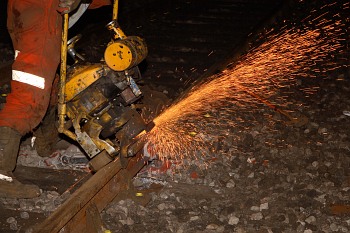
Friday 18th March was the final day of working, when the welding
gang completed their contract by grinding all the welded joints down to the rail
profile while also re-checking alignment. Any final snagging and checking of
chairs and keys was done that weekend, and the tunnel was declared open for
traffic. Possession was handed back to the operations department a week earlier
than originally planned. The first public service started the following
week, on 27th March.
| |
|
|
 |
 |
 |
| |
|
|
|
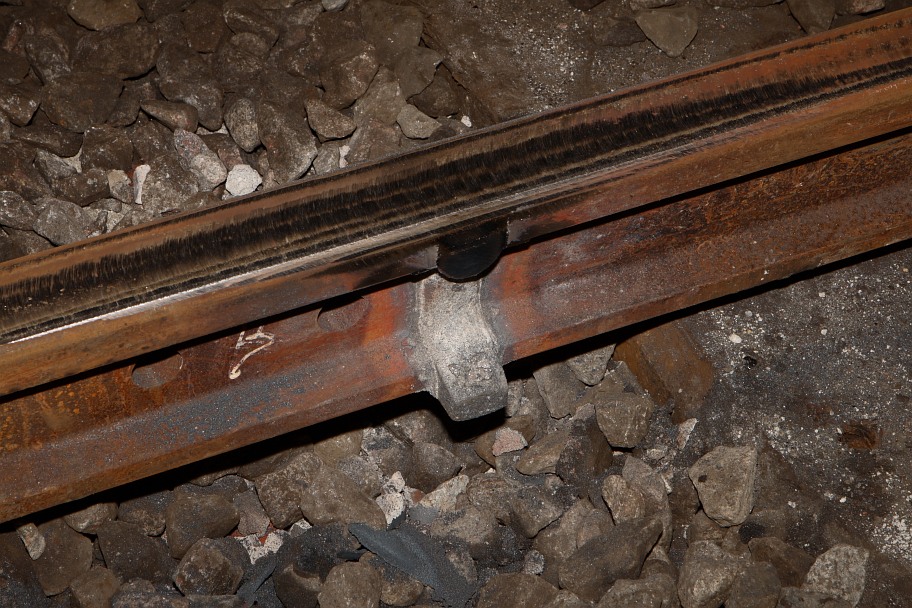
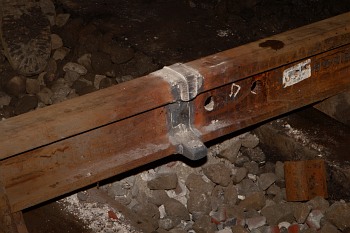
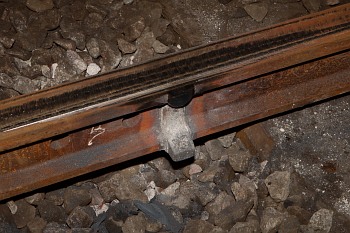
Mould broken
away to reveal the weld metal and feeder. |
A hydraulic
cutter is clamped to the rail to remove the excess weld while still hot,
before grinding. |
Joint cooled
and ready for the final grinding process. |
| |
|
|
 |
 |
| |
|
|
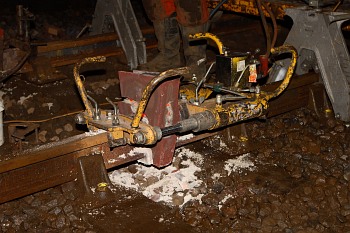
The grinder
can be mounted several different ways for the top and each side of the rail. |
Wheels and
rollers keep everything in alignment. |
| |
|
For those of you who like numbers, the following tally gives some idea of the
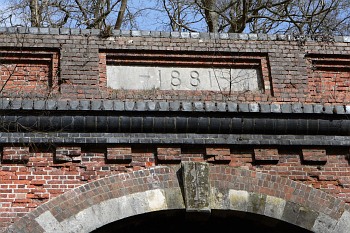
scale of the operation. West Hoathly Tunnel is 731 yds long and 129 years old.
During the track relaying about 20 volunteer members were involved on various
days as well as three full-time members of staff. Some days saw up to 12 people
working, and on others there were as few as three. 1,008 sleepers were moved twice.
2,016 chairs were replaced using 6,048 screws and ferrules. 72 new rails were
laid and 66 welds were made. The only figures we don't have to hand are the
number of miles walked by the various volunteer members involved, and the gallons
of tea consumed!
| |
|
 |
 |
| |
|
|
Ready for
traffic – a finished weld. |
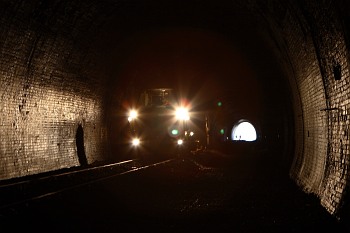
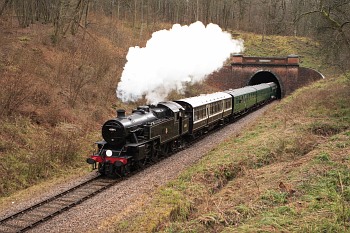
What we have
all been waiting for. 42085 heads the 3pm Kingscote–Sheffield Park
service out of the south portal on 27th March: one of the
first scheduled services through the re-laid tunnel. |
|
|
|

Return to BRPS Home Page,
to the Timetable or to Special
Events
Current Infrastucture News
Archive of Infrastucture News: 2013-14 - 2015-16 - 2017 - 2018 - 2019 - 2020 - 2021-22 - 2023
Archive Reports: Northern Extension Project -
Permanent Way and Lineside News (2007-2011) - P-Way News (2002-4)
Visitor Info. -
Museum -
Trust -
Catering -
Contacts -
What's New -
Projects -
Locos -
Carriages & Wagons -
Signals -
History -
Other -
Links -
Search -
FAQ
Why not become a BRPS Member? -
Get more involved as a Volunteer
Your ideal Film/TV location?
 All photographs and text are © Michael Hopps.
This page last updated 8 May 2010 by Michael Hopps and Richard Salmon, 6 September 2021.
© Copyright BRPS. Privacy Policy
|